

What is a Windows Speech Recognition Macro?
A Windows Speech Recognition macro is a vocal command that can be used to execute more than one action. Think of a macro as an alias for more operations. For example, instead of dictating all letters from A to Z, you could just say 'Type Alphabet' and Windows Speech Recognition will type all letters of the alphabet for you. As you will see, Windows Speech Recognition macros can be used to do many useful things which will improve your productivity.
What to Install in Order to Use Windows Speech Recognition Macros
The first step is to download an application made by Microsoft called Windows Speech Recognition Macros. Before you download it, Microsoft will verify if you have a genuine copy of Windows. If you don't, you won't be able to download the application. If you do have a genuine copy of Windows

Go to Start Menu -> Windows Speech Recognition Macros. The application can be also found in the folder 'C:\Program Files\WSRMacros\'.

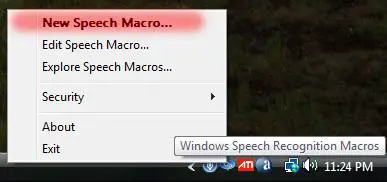
When you click on the shortcut, it will launch both Windows Speech Recognition and Windows Speech Recognition Macros. In the system tray, in the down right corner of your screen, you will see the Windows Speech Recognition Macros icon.

How to Create Windows Speech Recognition Macros
Once you have started the application, you can see the Windows Speech Recognition Macros in the down right corner of your screen. Right click and, in the contextual menu, click on New speech Macro. Alternatively you can double click on the Windows Speech Recognition Macro icon.
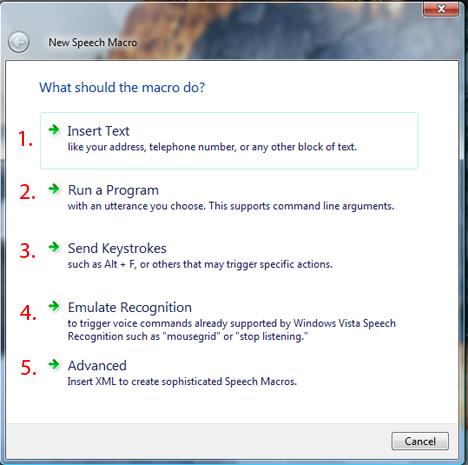
A new window called New Speech Macro will appear, with five available options from which to choose. Each of these options will let you create a macro which does a specific action. I will explain what you can do with these options and how they can make your day to day computer activities easier and less time consuming. To select an option, just click on its button.
Create Macros Which Insert Specific Blocks of Text
By clicking on the first option, called Insert Text, you will create a macro which can insert a specific text. For example, imagine having to sign yourself at the end of each e-mail. Instead of dictating With Respect, your name, your position in the company and other similar details, you could just say sign my name or something else more to your liking, and Windows Speech Recognition will type it all for you.
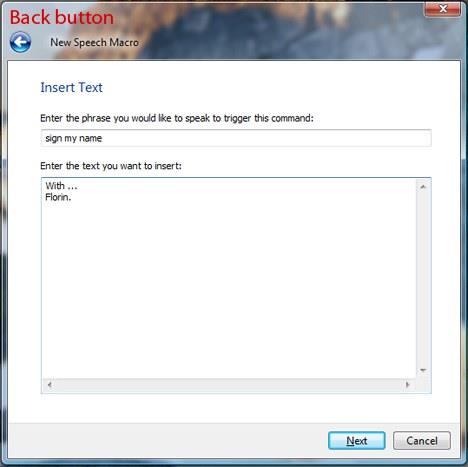
Once you click on the Insert Text button, the New Speech Macro window will pop-up. Now you have to specify the trigger and the text you want to insert. The trigger is a sign, in our case a voice command that is expected before the action can be done. For example, you need to say 'Start listening' (trigger) before Windows Speech Recognition starts listening (action trigger) to any of your commands. If you don't say the trigger command, Windows Speech Recognition remains idle without doing anything.
The first field from the New Speech Macro window is the trigger field. Type or dictate the trigger, in our case 'sign my name'. In the second field called the 'action triggered', you should type the text that will be inserted. This can be of any length. For this example, I typed With Respect, new line, name and the remaining details.
Once you are done with the trigger and the action triggered, click on Next.
Now you are given the opportunity to recheck the trigger and the action triggered. Also, you can give a specific name to the macro file you are creating.
NOTE: Every macro is saved into a file and all macros are located by default in the 'Documents -> Speech Macro' folder. It is recommended NOT to change their location. By default, Windows Speech Recognition looks for macros in this folder and will load them and use them when triggered.
Leave the 'Digitally sign' option checked and click on the Create button.

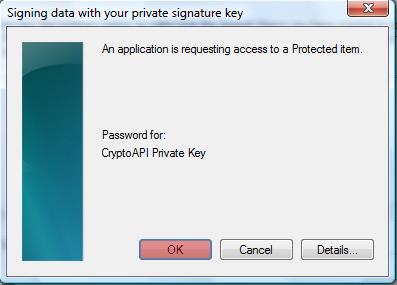
A new window will appear coupled with an User Access Control (UAC) prompt, asking for your permission to continue. Afterwards, you will see a window called 'Signing data with your private signature key'. Click on OK and you will be announced that your macro has been created.
Create Macros Which Run Programs
With this option you can create macros which open an application of your choice when you dictate a certain command. To create such a macro, when you are in the New Speech Macro window, choose the second option called 'Run a Program'.
You are prompted for a voice trigger command and for the path to the application you wish to open. To select the application, click on the Browse button.

Look for the application you want to start when saying the trigger command and click on OK.
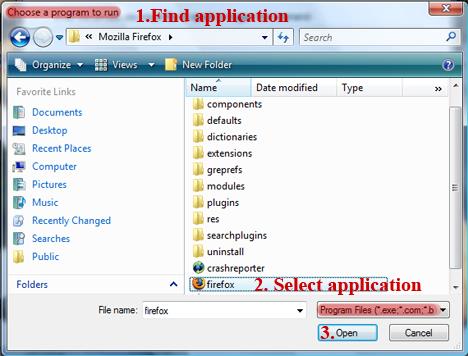
In the last field you can add command line arguments for the application you just selected. For example, in the screenshot below, I am making a macro which launches Mozilla Firefox so that, every time it starts, it loads our site.

When done, click on Next. Afterwards, you will see a window called 'Signing data with your private signature key'. Click on OK and you will be announced that your macro has been created.
Create Macros Which Send Keystrokes
With this option you can create macros which send keystrokes to the computer when you dictate a certain command. Once the New Speech Macro window appears, choose the third option called 'Send Keystrokes'.
You are now prompted for a voice trigger command and the keys you wish to have pressed when the action is triggered. With this option you can create voice triggers for specific keyboard commands. Instead of 'ALT+F4' (close current application) you can dictate 'close window'.
Enter the voice command that you want to use and the combination of keys that will be sent to the currently running application.
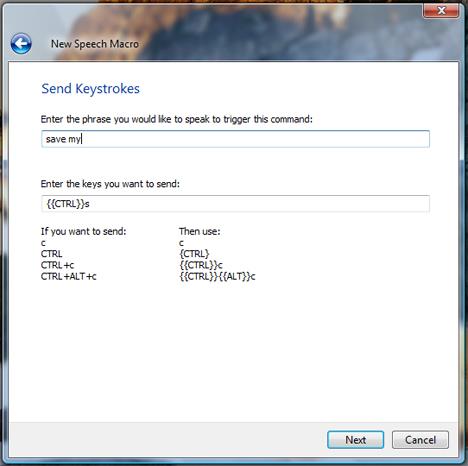
IMPORTANT: The keys between double braces -{{key}}- are really important and are called modifiers. As a rule, they will always be higher in precedence than all the other keys. The keys enclosed in single braces -{key}- are called non-modifiers. The rest of the keys are considered normal keys (letters or numbers) and they don't need braces.
The keys that are mainly used for double or single braces are Ctrl, Alt, Shift, F1 to F9 , TAB, ESC and such keys. The last set of keys, normal ones such as a letters or numbers, won't have any set of braces and they will be last in the sequence.
A modifier is a key that is pressed, awaits for another key to be pressed and then they are both released. This is used when using combination such as {{CTRL}} C (copy), {{CTRL}} V (paste), {{CTRL}}{{SHIFT}}{ESC}.
The keys that are enclosed in single braces are those that aren't apart of simple numbers and letters and are also not pressed and kept pressed awaiting for another key.
It is important to keep the braces precedence to have a macro working properly. The order is {{all modifiers}} {all non-modifiers} normal keys . To better understand this, it is correct to use {{CTRL}}{{SHIFT}}{ESC} (notice that there is no modifier after the non-modifier), but incorrect to use {ESC}{{CTRL}}{{SHIFT}} or {{CTRL}}{ESC}{{SHIFT}}. The modifiers -{{keys}}- must always be put first.
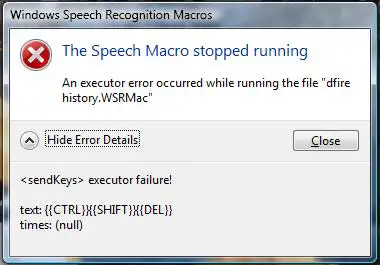
When creating this type of macros be careful to the numbers of braces used for modifiers and non-modifiers keys and the order in which you write them. If there is one little mistake, the macros won't function correctly and you will get an error message similar to the one below.
Create Alias Macros for Default Commands
With this option you can create a Speech Macro that emulates an existing Windows Speech Recognition command using a phrase of your own. If you want to know the complete list of Windows Speech Recognition, go to Control Panel -> Ease of Access -> Speech Recognition Options -> Open the Speech Reference Card. If you think that some of the commands are not really natural and easy to remember, you can use this option to define other commands which do the same thing but are easier to remember.
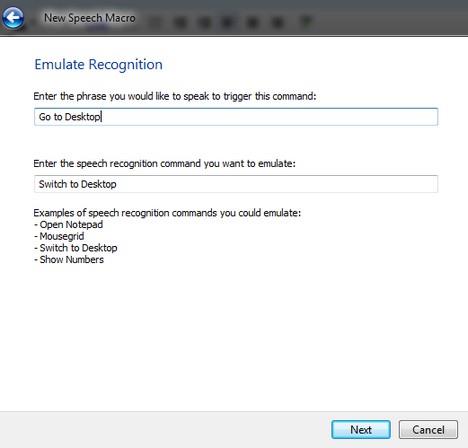
To quickly create such aliases, click on Emulate Recognition in the New Speech Macro window.
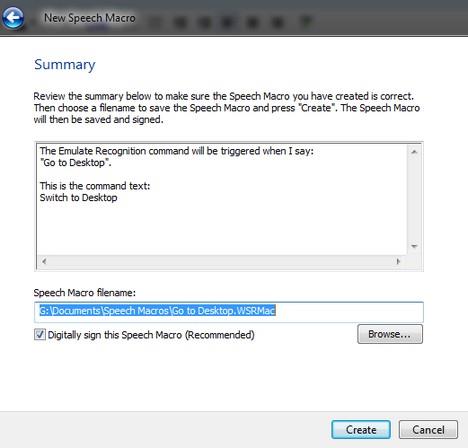
In the first field type the command you want to use. In the second, write the Windows Speech Recognition command that you want to emulate.
Review the macro you just created, specify the filename and click on Create.
Create Macros which Execute Advanced Commands
You can create also more advanced macros which execute commands stored as XML code. XML is a simple markup language designed for easy information sharing between computers, applications, etc. It is generally used to describe different kinds of data in a structured way.
Windows Speech Recognition Macros allows you to load and use advanced commands stored as XML files. This kind of XML macros can execute tasks such as searching the weather for a specific location or help you navigate through your PowerPoint slides. Microsoft provides you a small library of advanced macros which you can download and use. They can be found on the Windows Speech Recognition Macros download page.
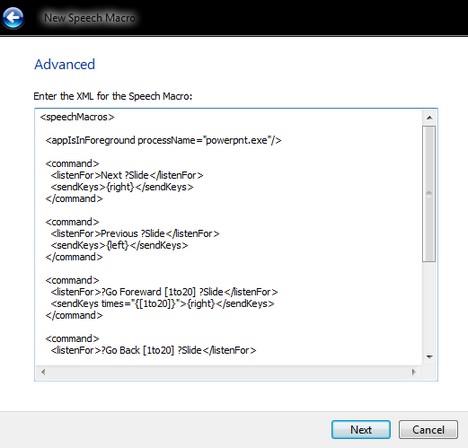
To create such macros, click on Advanced in the New Speech Macro window.
Next, download the macros you want from the Windows Speech Recognition Macros download page. Open them using Notepad or any other text editor. If you don't know how to do it, read our tutorial called How to open files using a different program than the default.
Then copy the whole text from Notepad, paste it into the New Speech Macro window and click on Next.
Then save your macro and you are done.
Conclusion
As you can see from this article, Windows Speech Recognition Macros is a very useful application which can simplify the way you use Windows Speech Recognition. If you have used it already don't hesitate to share your experience with us and our readers. All will be happy to learn more about this application.


0 comments:
Post a Comment